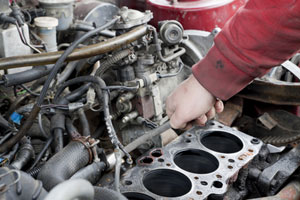
A head gasket is a very important component of the engine, so if you have a blown head gasket you need a head gasket repair or replacement as soon as possible. If you wait too long it will result in serious and irreversible engine damage requiring a complete engine replacement.
The replacement of a head gasket can take a long time, especially in modern cars with injection engines. These cars have many parts that need to be removed before the cylinder head can be removed.
You can do a head gasket repair by yourself. But you need experience, knowledge, time and a lot of patience to get the job done.
Can you do a head gasket repair by yourself
If you are experienced in car repair jobs and decide to do the head gasket repair by yourself, follow these steps.
Tools you need to get the job done
Buy, borrow or rent the following tools when you do a head gasket repair and replacement by yourself:
- A new head gasket (make sure you buy the right head gasket for your car model)
- Jack with Stands
- Head Gasket Socket Wrench
- Torque Wrench
- Wire Brush
- Parts cleaner
- Screwdriver set
- RTV Silicon Tube
- Brake Parts Cleaner
- Fresh coolant
- Fresh oil
- Battery charger
- Car manual for you vehicle (get it form your car dealer or any parts store)
- Someone to help you
Head gasket replacement instructions
To get access to the head gasket you have to remove several components and you have to disconnect entire systems.
So before you begin replacing the head gasket make sure that the car engine has cooled off totally before you undertake the following head gasket replacement instructions.
- Disconnect the battery and fuel hookups and drain the coolant fluid.
- Disconnect the ignition system and spark plugs.
- Remove the air intake, the carburetor/throttle body, coolant lines, vacuum lines and intake plenum.
- Set the piston of the engine cylinder to the position of the top dead center (TDC) and remove the timing belt. Be careful because this method could be different for each car model. Using the wrong method can damage your valve train. For the correct method use your Haynes manual. The following method is often used: use a battery charger to apply power directly to the starter motor. Turn off the battery charger when the first piston is at the Top Dead Center (TDC).
- Disconnect the headers. However, if you need more space, you have to remove the headers entirely.
- Remove the timing covers
- If your engine has overhead valves you need to remove the push rods and rockers too. If your engine has an overhead cam you can remove the entire assembly as one.
- Remove the head bolts. First unscrew all bolts, from the left-hand side and working your way around in a cross-hatch pattern, till they are hand-tight and remove them together. For using the correct method to remove the bolts use your Haynes manual.
- Next step is to remove the head. Be careful with this one, never force it off, ask someone to help you with it.
- You can now carefully lift the head gasket from the engine block with your fingernail and clean the surface with parts cleaner. Never use metal objects, like a screwdriver, to lift the head gasket as it will damage the mating surface.
- Place the new head gasket onto the engine block and check that you have lined it up correctly with the cylinders. The head gasket has a little hole in opposite corners that will help it line up both the head gasket and the head.
- Place the head back on. Sometimes the head gasket moves out of position when you are trying to place it back. A trick is to put pencils into the bolt holes to keep the head gasket on its position. Use a torque wrench to precisely set the force of fastening the bolts. Use your Haynes repair manual if you are unsure about the correct torque amounts.
- Put everything back in reverse order.
- And last but not least: refill the coolant and change your oil before starting your car.
[tubepress mode=”playlist” playlistValue=”PLD4D6D73F83AA54C3″ theme=”youtube” orderBy=”published” description=”true” descriptionLimit=”65″ hqThumbs=”true”]
These instructions are general instructions for a head gasket repair and replacement, your car can be different.
If you are in any doubt always ask a professional for help.


Follow Us!